Sri Lanka’s First All-on-X Full Mouth Reconstruction Using Stackable Surgical Guides

Advanced Immediate Loading and IV Sedation Techniques in Modern Implantology

Introduction
In May 2024, Dr. Hirantha Weragoda reached a landmark achievement in restorative dentistry. Sri Lanka’s first All-on-X full mouth reconstruction successfully completed utilizing advanced stackable surgical guides. This complex procedure integrated state-of-the-art digital workflow with immediate loading protocols. This provides the patient with functional, aesthetic results in a single session. By utilizing
IV sedation, the surgical team ensured maximum patient comfort while maintaining the precision required for multi-unit implant placement. This case represents a significant leap forward for innovative dentistry in Sri Lanka. It demonstrates the efficacy of guided surgery in achieving predictable outcomes for total oral rehabilitation
Clinical Case
A 60-years-old female patient presented in early 2024 with several complaints. She had failing full-mouth bridges that I deemed periodontally unsound. This caused her significant aesthetic and functional distress, bothering her intensely when smiling. Her lower arch also presented with an unsatisfactory restoration. Clinically, she experienced pain. Investigations revealed periapical cysts under the both lower lateral incisors which I had treated with root canal. Due to the severity of these issues, I recommended a comprehensive full-mouth reconstruction. Patient agreed to proceed with after a thorough explanation. It made this the first historical cases of its kind in Sri Lankan dental history.
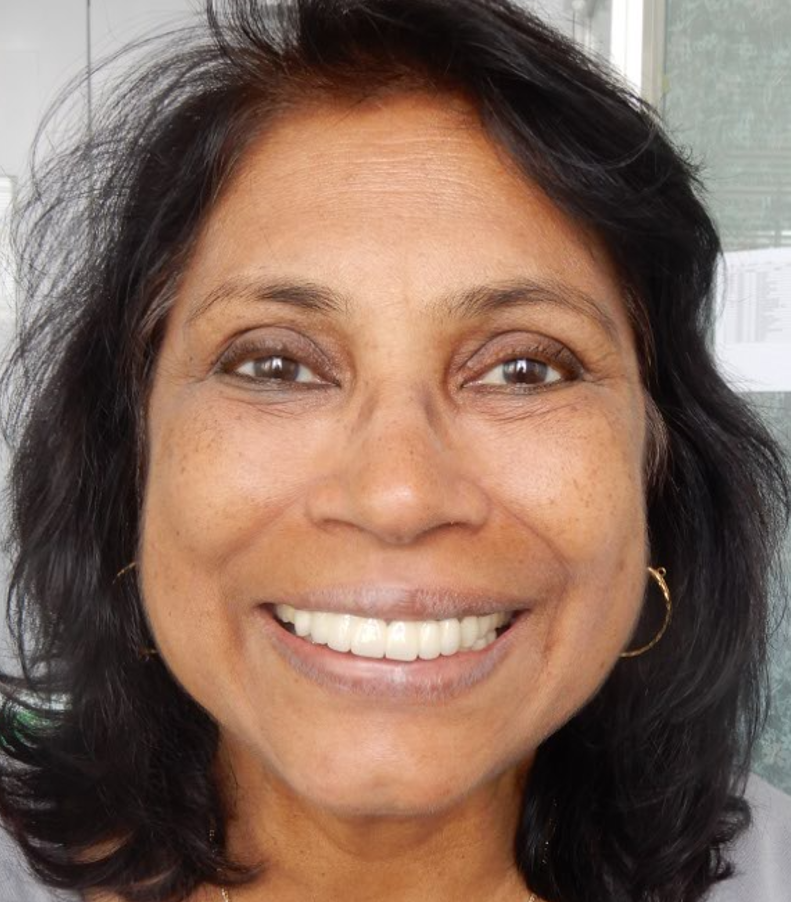
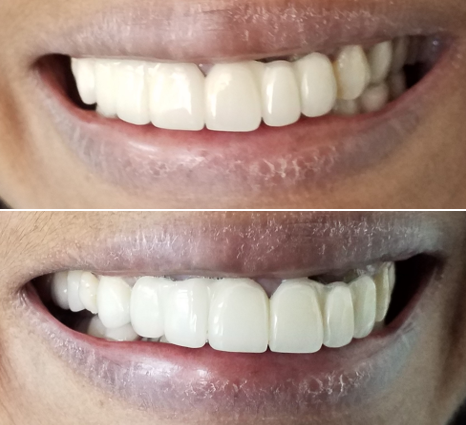
“A smile is more than just teeth; it is the foundation of facial harmony and self-expression. In this pre-operative view, we identify a complex ‘problem list’ that had become unacceptable to the patient.
A closer look at the failing anterior bridge reveals the root of the issue. The ill-fitting design and incorrect proportions led to a shifted midline and a tilted (canted) smile. Physically, this resulted in incompetent lips at rest, where the mouth cannot close naturally. Emotionally, the impact was even greater. The patient developed a habit of pursing her lips to hide the dental work . This is a common sign of lost confidence during conversation. Our goal was to move beyond a simple fix and provide a total reconstruction. That restores both her dental health and her ability to speak and smile without hesitation.”
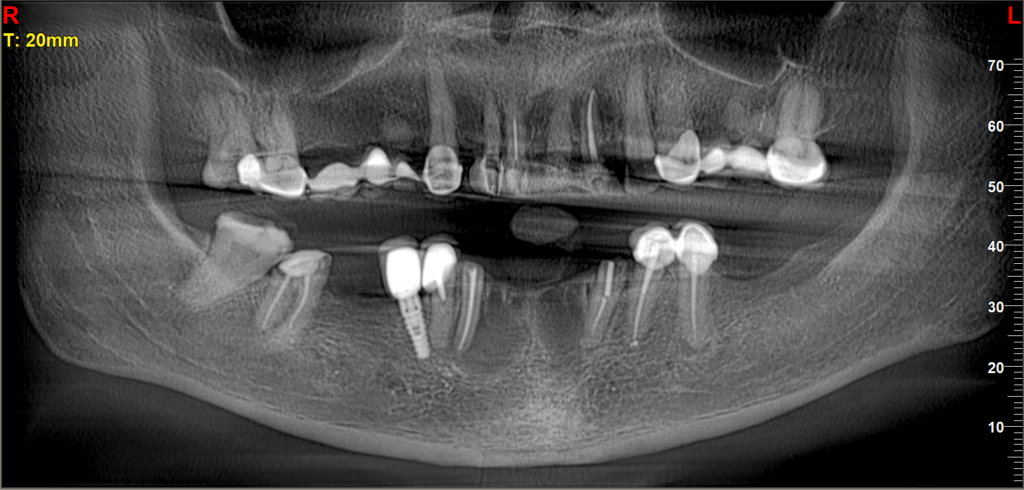
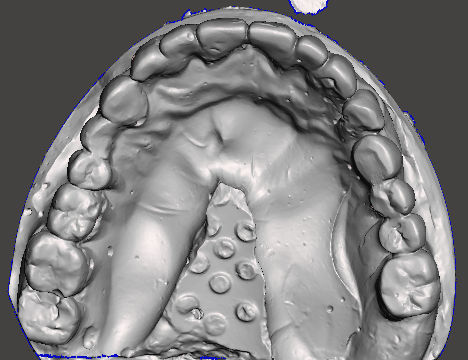
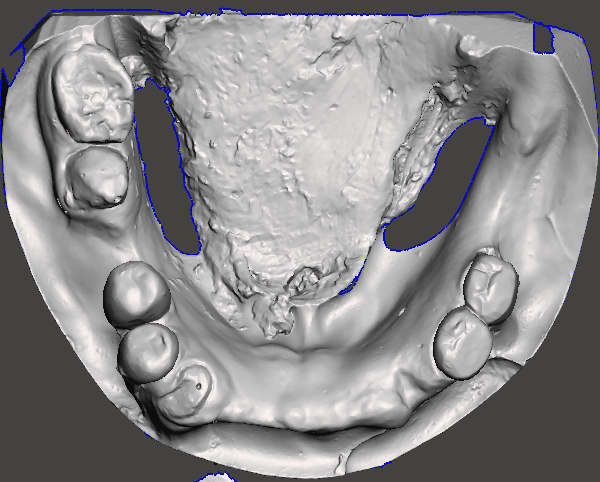
“Digital diagnostic models: Intraoral scans used for precision treatment planning and virtual design of the stackable surgical guides.”
Treatment planning
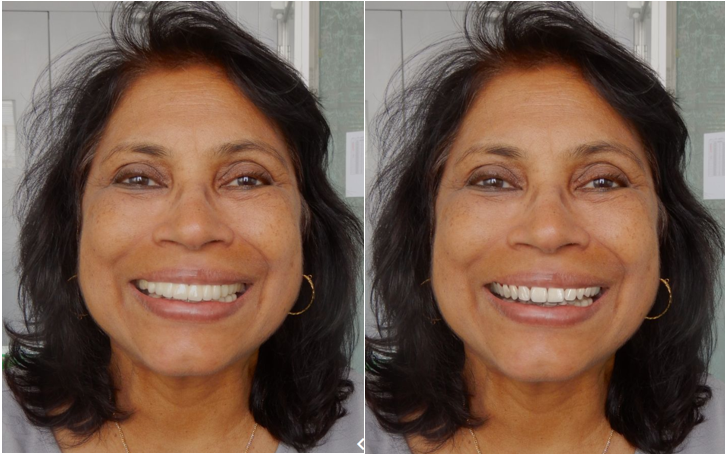
Before and after photographs: “The key to a predictable outcome is starting with the end in mind. These images show the transition from the patient’s initial presentation to our AI-driven aesthetic simulation. By using Straumann Smilecloud, we were able to virtually test different tooth shapes and positions. That lead us to find the perfect balance of facial harmony and labial fullness. This digital blueprint served as the foundation for the entire surgical and prosthetic workflow.”
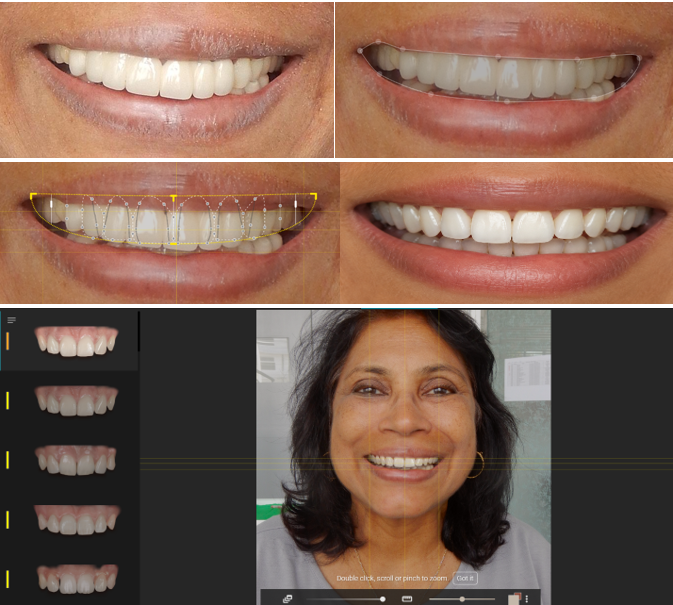
Digital Smile designing Protocol: “One of the most rewarding parts of our digital workflow is showing patients their future smile. Using the advanced Straumann Smilecloud software, we create a digital sequence that maps out the entire transformation. This isn’t just a computer drawing—it’s a precise medical plan. That allows us to restore not just teeth, but facial youthfulness and confidence. Experience the future of dentistry, where technology meets artistry.”
“A primary objective of this digital design was to address the patient’s two greatest concerns. A shifted dental midline and a significant aesthetic cant (tilt) of the smile. We Used the precision tools within Straumann Smile cloud. And able to virtually realign the dental midline with the facial midline and level the occlusal plane. This ensured that the final restoration. It was not only be beautiful but perfectly symmetrical and balanced within the patient’s face. And providing the facial harmony they had previously lost.”
Virtual Surgical Planning: Engineering the Foundation with Sub-Millimeter Precision
To ensure a highly predictable and aesthetic outcome, a multi-model diagnostic approach meticulously guided our treatment planning phase. I used Pre-operative photographs, CBCT scans, and intra oral scans. I performed a sophisticated digital smile design. By defining the precise tooth morphology and implant positions needed to achieve her desired aesthetics. This digital blue print allowed for the virtual design of stackable surgical guides. A first in Sri Lanka, ensuring precise placement for immediate loading under IV sedation.
To achieve a truly state-of-the-art outcome, we utilized a multi-platform digital workflow. By integrating Blue Sky Bio and Meshmixer, we engineered a complex Stackable Surgical Guide system. The gold standard for predictable full-mouth reconstruction. The intricate design and precision manufacturing of these guides were executed by Image 3D Conversion. Situated in Assam, India, the leading authority in surgical guide technology. This synergy of advanced software and expert engineering allowed for unparalleled accuracy during the implant placement.
The stackable surgical guides were custom-engineered specifically for the Osstem Implant System. A seamless integration was ensured by Blue Sky Bio digital design and Osstem’s precision surgical kit. Every implant was placed with the exact depth, angulation, and primary stability required for immediate loading.
The Digital Blueprint: Multi-Stage Surgical Guide Architecture in Blue Sky Bio
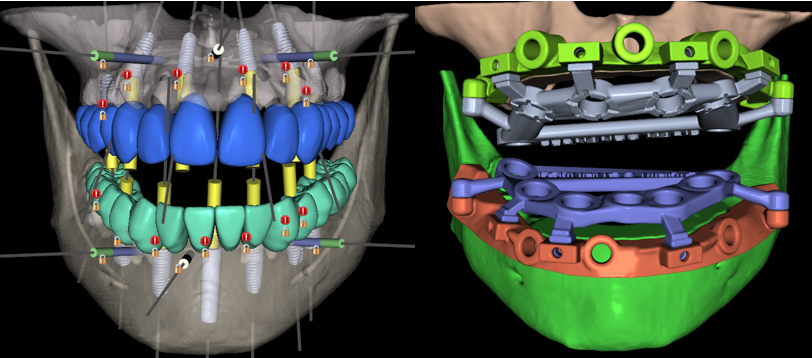
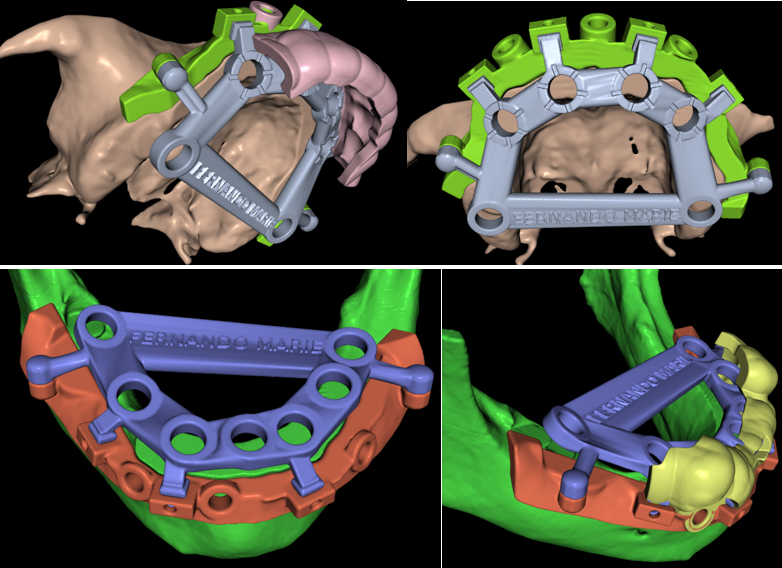
Precision is not an accident—it is engineered. Our stackable surgical sequence uses a Pin Guide for stability. A Bone Reduction Guide for a perfect foundation, and an Osteotomy Guide for exact implant placement. This three-stage digital workflow ensures that the patient’s new smile is exactly where we planned it. Restoring both function and confidence with state-of-the-art technology.
The Master Plan: A fully integrated digital environment where the aesthetic vision meets surgical precision. This view displays the final ‘stackable’ architecture for both arches. Ensuring that the implant positions, bone reduction, and temporary prosthetics are perfectly synchronized according to the All-on-X protocol. To ensure absolute fidelity between our digital plan and the surgical reality, we utilized custom-designed osteotomy guides. This specifically calibrated for the Osstem 5mm Guide Sleeve Kit. We integrated these specific dimensions into our Blue Sky Bio workflow. By this we achieved a seamless fit that allows for maximum stability. And cooling during the drilling sequence, ensuring the implants are placed with sub-millimeter precision
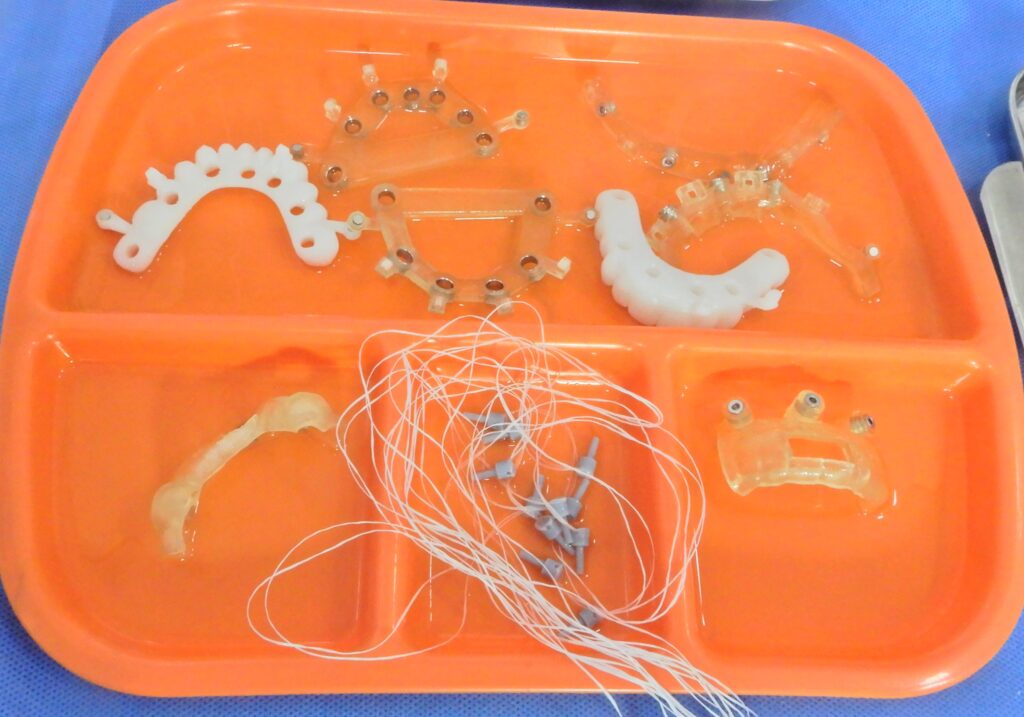
The physical manifestation of our complex planning: the stackable surgical guides, ready for action. These high-precision tools were manufactured by Image 3D Conversion in Assam, India. They are expertise in translating our Blue Sky Bio designs into these tangible, sterile guides. It allows us to execute full-mouth reconstructions with such incredible accuracy and predictability
Getting ready for the Surgery
With the digital smile design complete, I engineered the entire stackable surgical guide system. First, the stabilizing pin guide, followed by the bone reduction guide. And finally, the osteotomy guide, all perfectly fitting on top of each other. Crucially, the temporary prosthesis itself was pre-designed to be stacked over the pin guide and mounted on to the implants. This whole process, including the temporary prosthesis, was meticulously created and fabricated according to the precise digital plan developed earlier. Surgical guides were design according to the dimensions of the OSSTEM 5mm surgical kit.
How we did the surgery
A step-by-step look at the guided surgical sequence. From the initial Pin Guide that anchors our plan, to the Bone Reduction stage. That creates the ideal foundation, and finally the Osteotomy Guide for precise Osstem implant placement. This rigorous digital-to-clinical workflow is what allows us to deliver the Immediate Loading Prosthesis. With absolute confidence in the final fit and aesthetics.
The surgery began with initiating IV sedation, administered by a specialist anesthetist. Ensuring the patient remained completely comfortable and relaxed throughout the procedure. With the patient fully sedated, I administered infiltration anaesthesia to the entire upper jaw. Including the buccal sulcus and palate, using Lignocaine with adrenaline at a 1:80,000 concentration. And completed the lower jaw anaesthesia using bilateral ID blocks and additional infiltrations. Under the instructions of the specialist anaesthetist, I supplemented the the initial anaesthesia. The initial anaesthesia is a combination of Marcaine and dexamethasone. Infiltrating locally to enhance and prolong numbness and maximize the patient’s comfort during the extensive procedure.
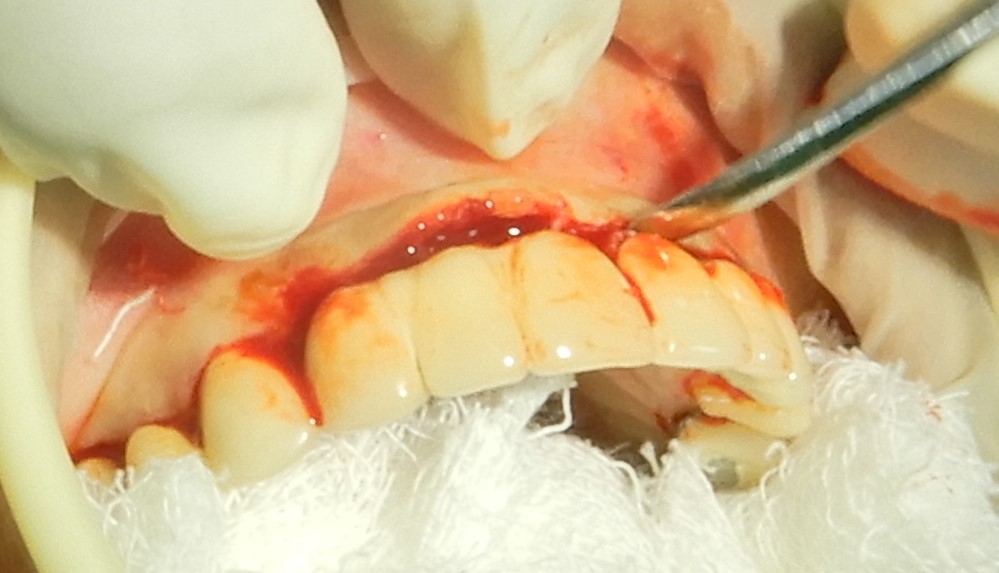
The surgical phase began by raising a full thickness palatal flap. Providing access and visualization, followed by a deep sulcular incision along the palatal gingiva. Once the sulcular incision was completed, I raised a full-thickness flap. Carefully reflecting the gingiva and periosteum away from the palatal bone, maintaining the their attachment along the midline. I then placed an anchoring suture to retract the flap. Ensuring the palatal alveolar bone remained uncovered, which optimized access and facilitated the rest of the surgical procedure.
I then raised a full thickness buccal flap, extending the incision from both maxillary tuberosities. Making an extension incision in the midline along the labial frenum. Next, The full thickness buccal flap was carefully anchored to either side of the buccal mucosa. This provide a thorough exposure of the buccal alveolar ridge and the maxillary bone.
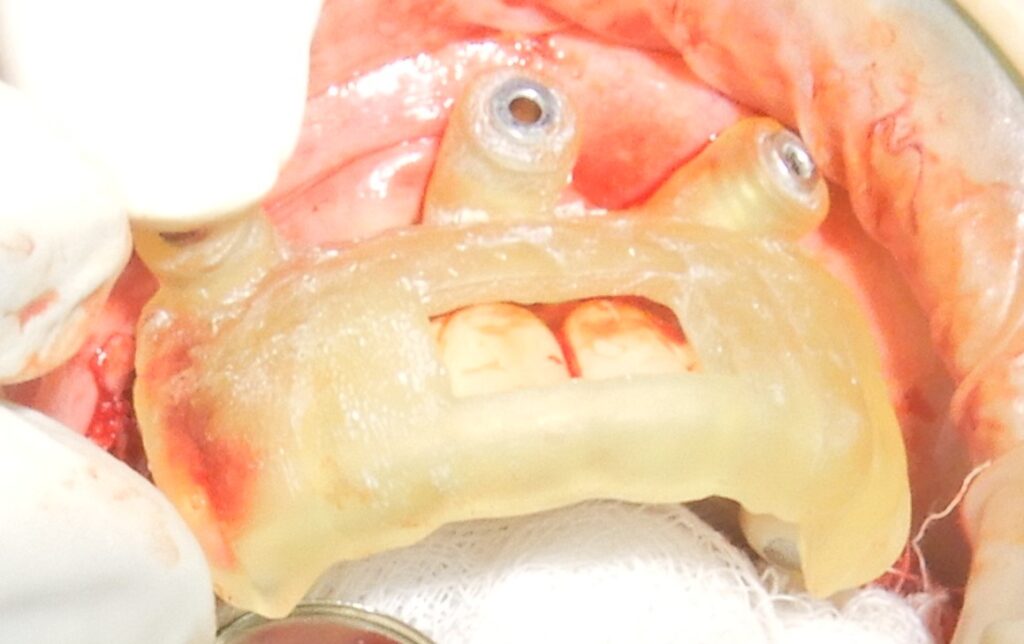
Then, the pin guide was fitted on the existing teeth. Using the guide for absolute precision, I then drilled three pin holes. I used the 1.8 x 18 mm pilot drill from the OSSTEM implant kit. We prepared the site for the placement of stabilization pins.
After that, I proceeded with the extractions of the standing teeth. Preparing the bone for the acceptance and precise fitting of the stackable guides. I thoroughly curetted the extraction sockets, meticulously clearing any remaining tissues or derbies.
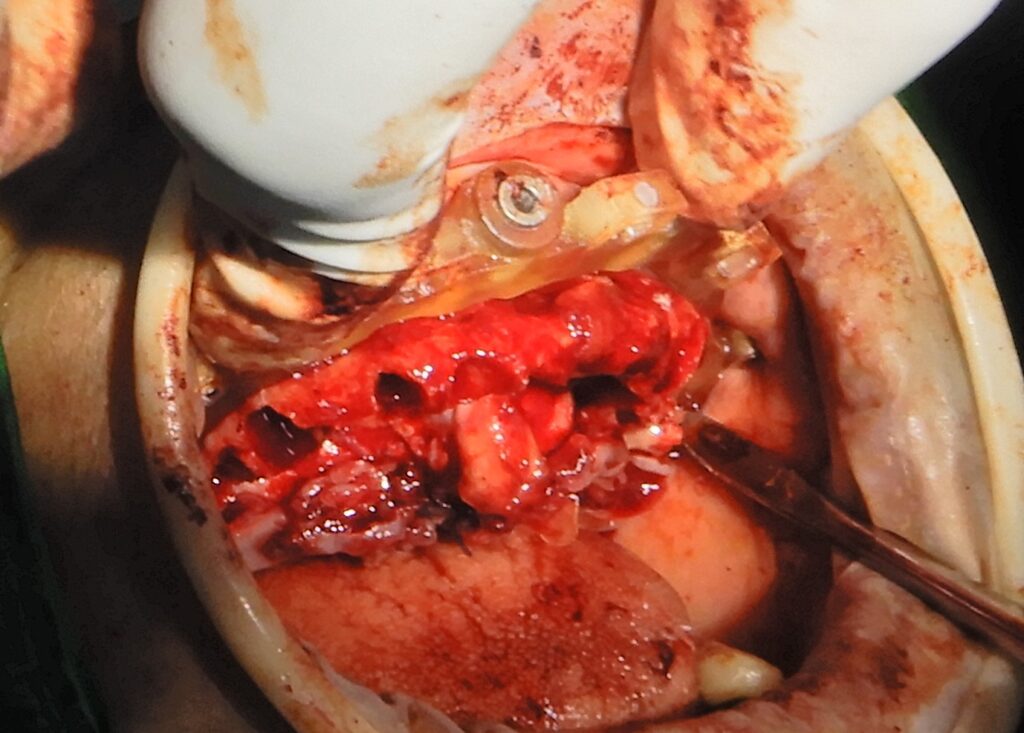
The upper bone reduction guide was meticulously fitted. Achieving intimate contact with the buccal side of the alveolar bone, verified to be free of soft tissue involvement. Once fully seated, It was secured with stabilization pins, perfectly aligned with pre-drilled holes guided by the pin guide. Following the secure placement of the bone reduction guide I confirmed its intimate contact with the underlying bone. Then the bone reduction was assessed.
The initial bone removal was performed using Rongeur forceps, and the harvested bone chips were collected for the future grafting.
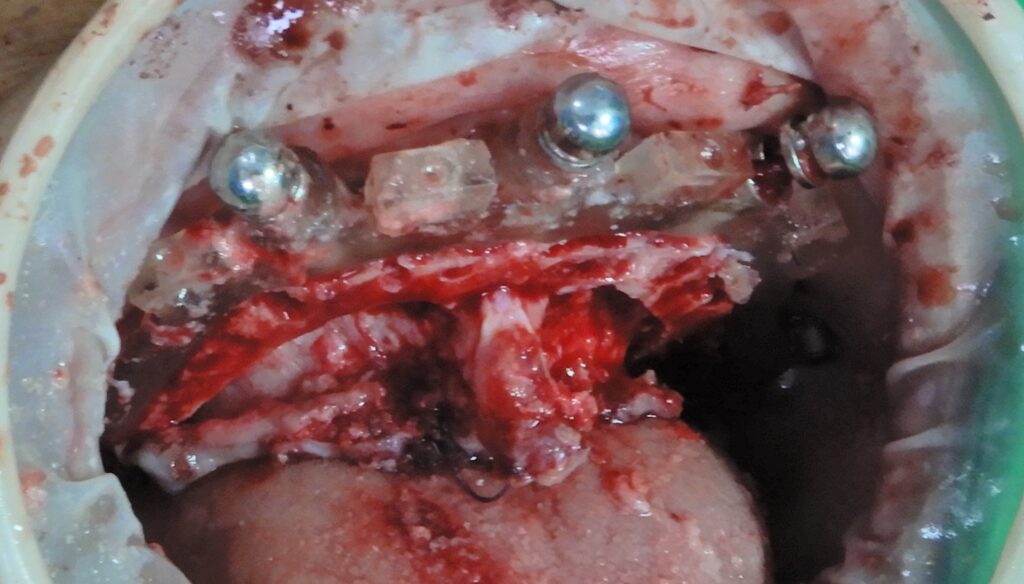
Following the gross bone reduction, smooth, fine reduction and er-shaping of the bone were performed. Using a large tungsten carbide surgical burr in a straight handpiece, with continuous, copious sterile saline. Irrigation to keep the area cool and clean.
During the entire bone reduction process, firm, steady pressure was maintained on the bone reduction guide. To prevent any vibration-induced shifting that could compromise the precision and adversely affect the final result.
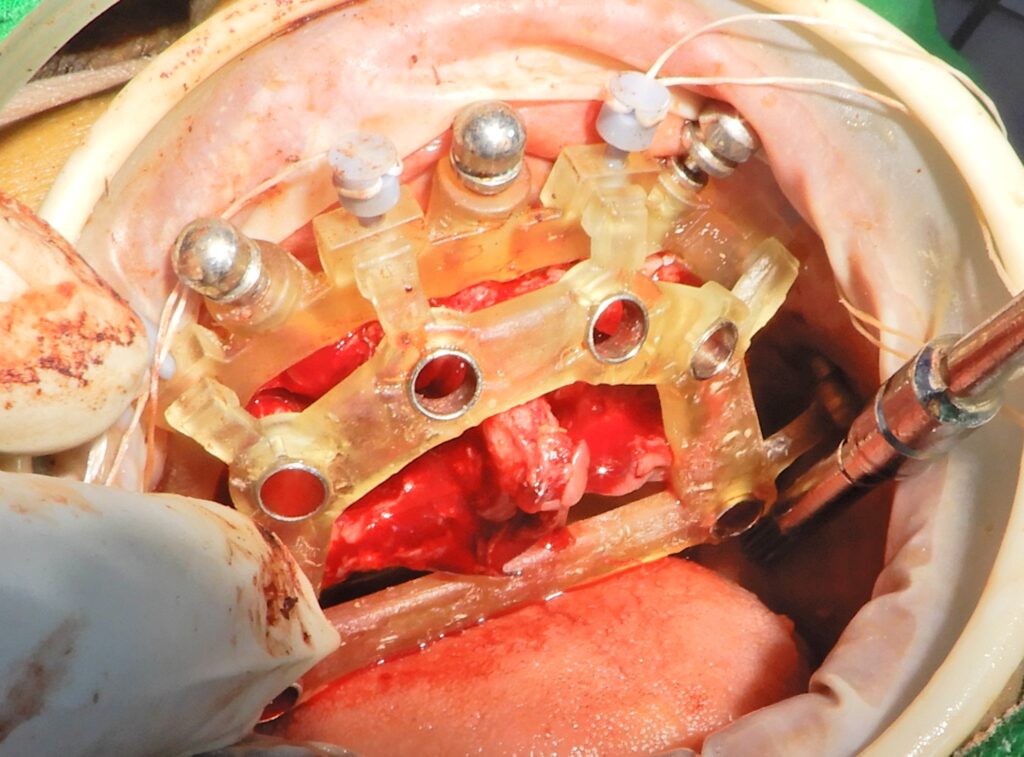
The osteotomy guide was subsequently mounted onto the bone reduction guide and firmly secured with the securing latches.
All osteotomy holes were meticulously checked to ensure they aligned perfectly along the augmented ridge.
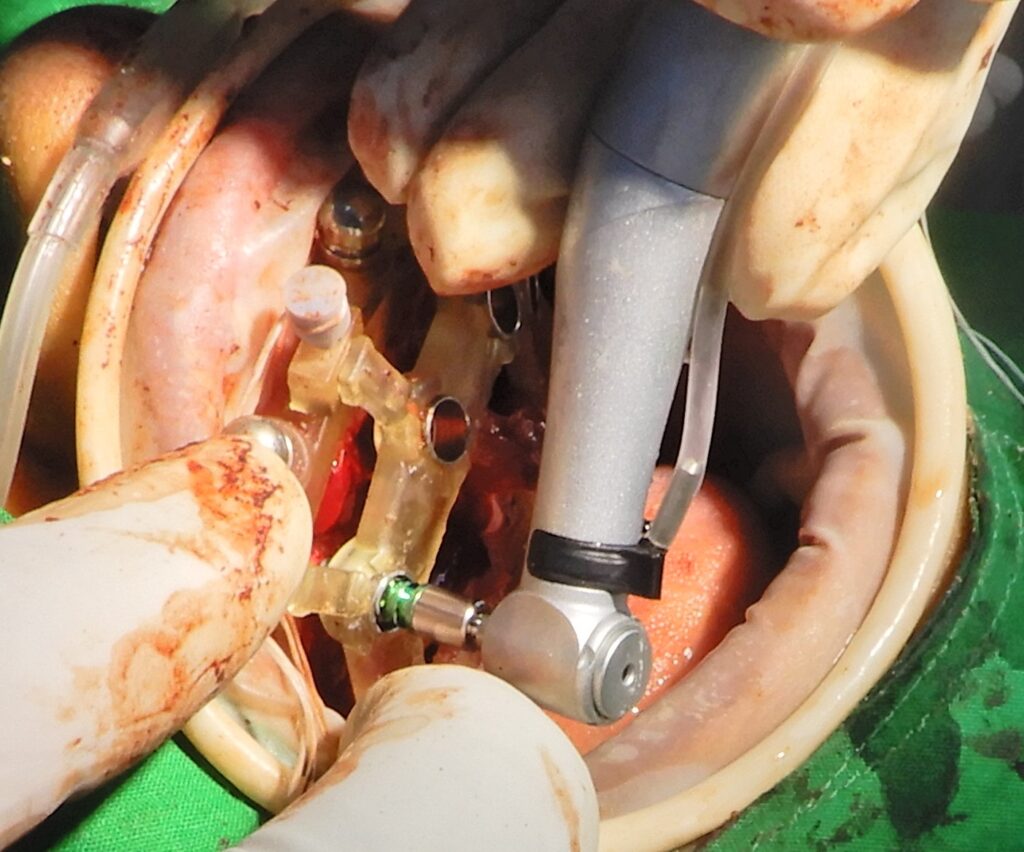
The osteotomies for the implant placement were initiated. Using the 5mm OSSTEM guided drills, ensuring precise placement according to the surgical plan.
Seven implants were placed along the upper alveolar ridge, precisely positioned according to the pre-planned surgical guide.
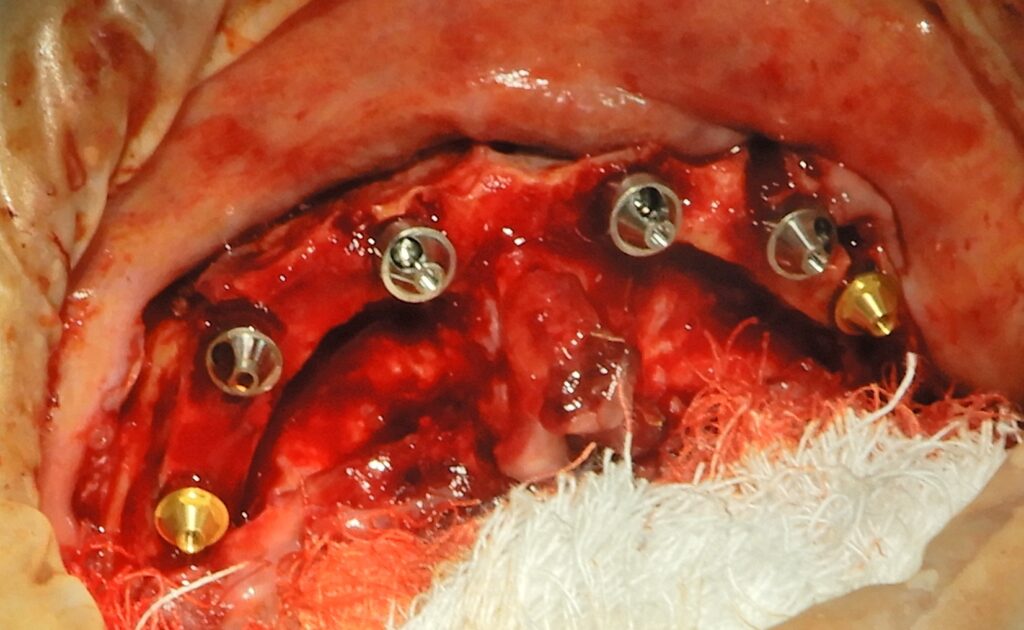
Respected multi unit abutments were selected and placed on to each implant with corresponding angles. Each abutment was secured while achieving a torque value greater than 20 to 25 Nm of torque.
All seven fixtures were inserted with precision, achieving the required primary stability. Represented by insertion torque values exceeding 35 and 45 Nm, ensuring optimal conditions for immediate loading.
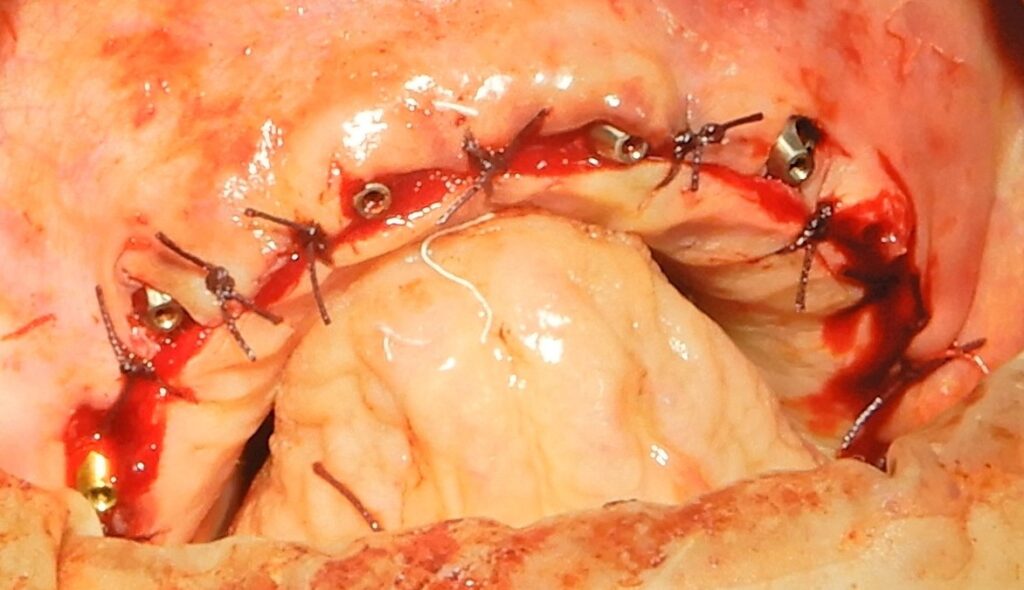
Following the implant placement, A paste made from previously harvested. Then I mixed the bone chips with the PRF and PPP solution, to create a bioactive graft. This mixture was used to repair remaining extraction sockets. And other defects in the upper alveolar ridge was then prepared. And finally, PRF membranes were carefully placed over the augmented bone.
Immediate loading of the temporary prosthesis.
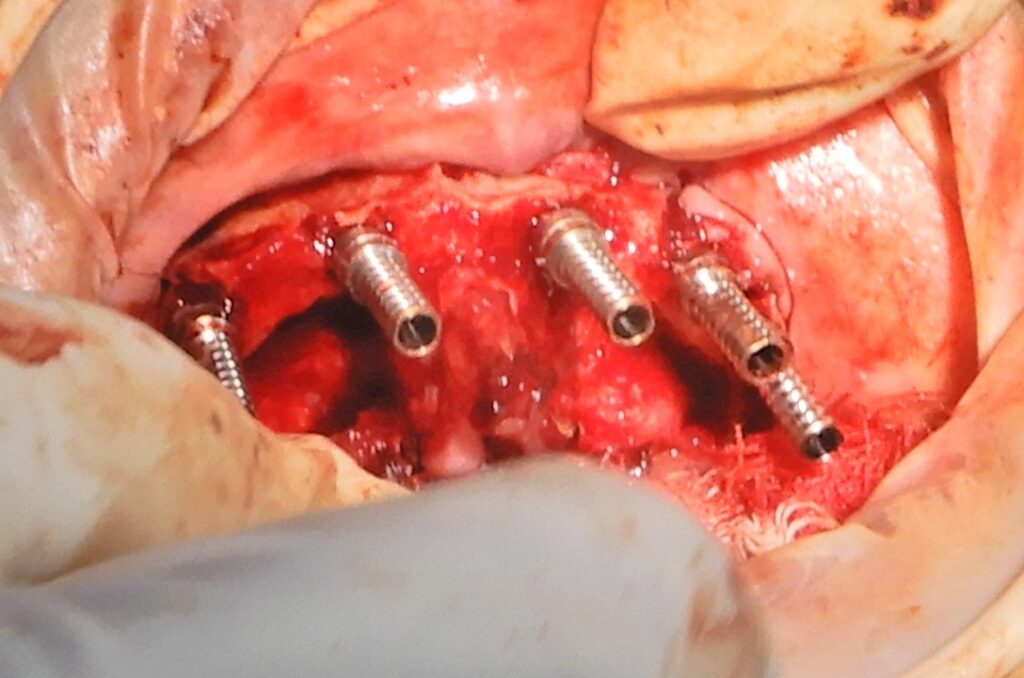
I screwed the temporary cylinders onto the MUAs.
Then, I placed a gasket over the cylinders and mounted the temporary prosthetics. Engaging the female components on the stackable guide.
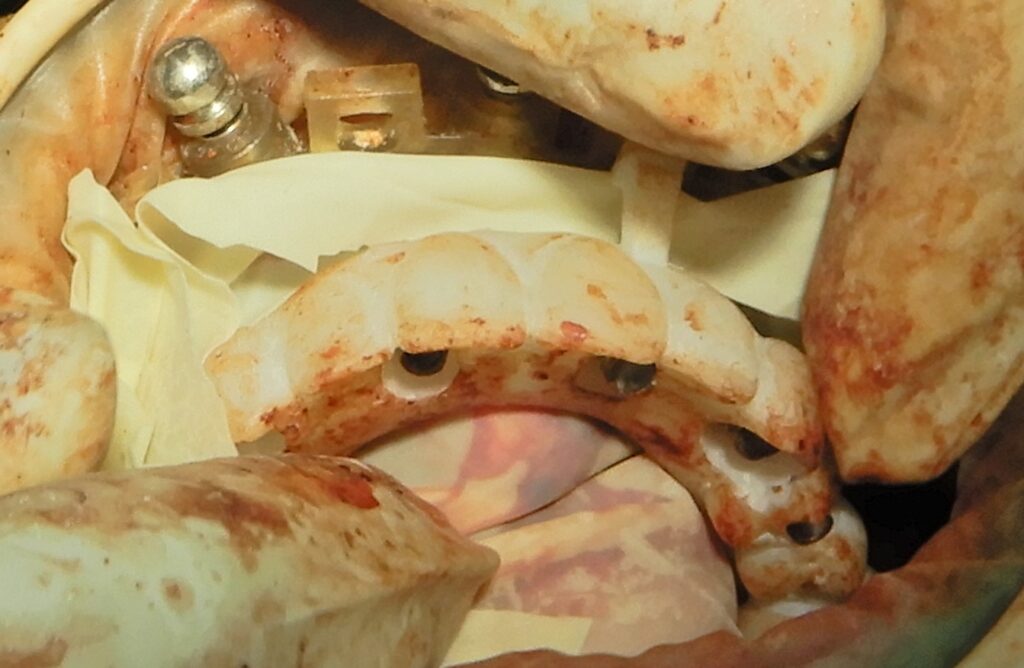
The protocol involved cementing the temporary cylinders directly to the temporary prosthesis. Using flowable composite, followed by cold cure acrylic to ensure proper strength.
“Crucially, the protocol required leaving the entire assembly undisturbed for fifteen minutes after the acrylic set. This ensured a complete curing cycle and prevented dimensional distortions that would hinder reinsertion.
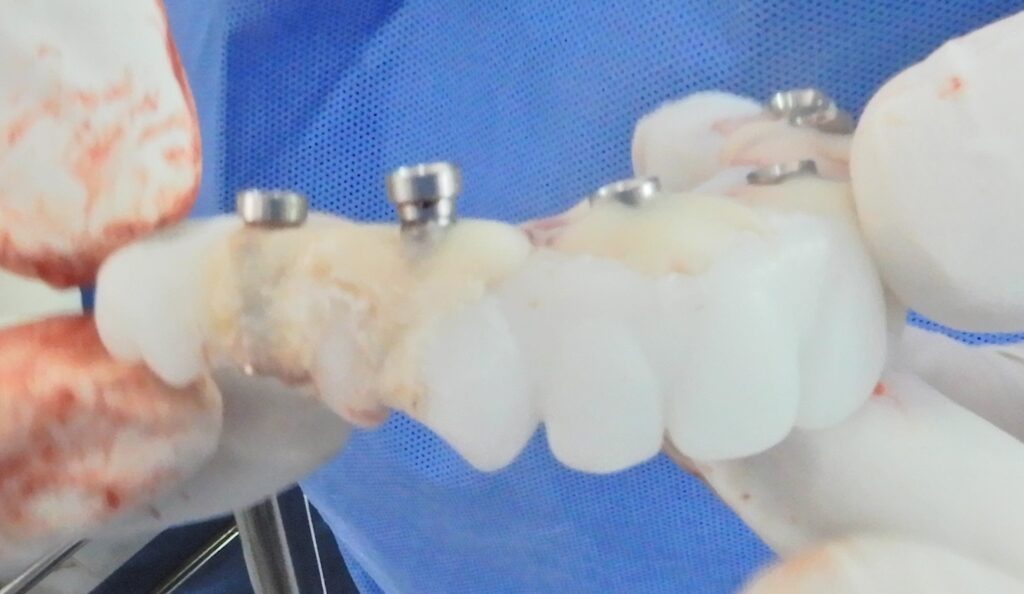
I then removed the immediate loading temporary prosthesis to refine, smooth, and polish it.
To prepare for final closure, I repositioned the gum tissue flaps and trimmed them for a precise fit. And then secured with 5/0 absorbable suture.
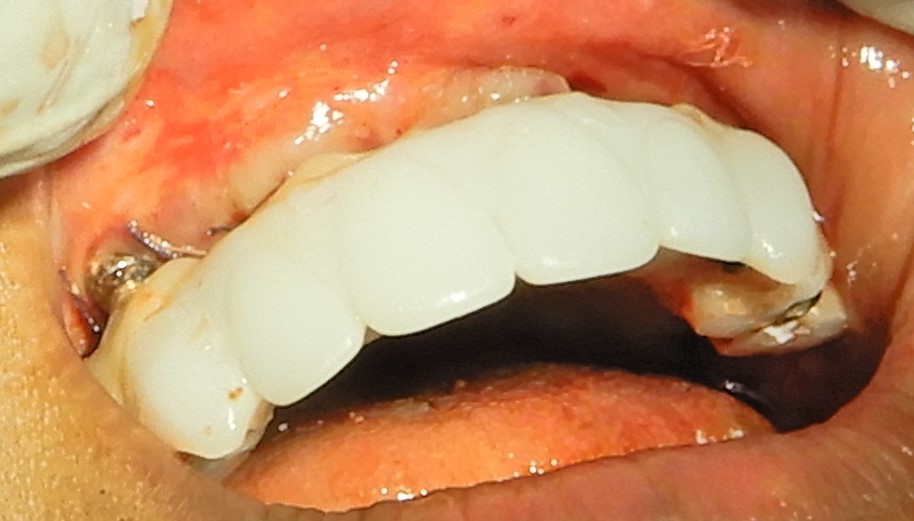
Upper immediate loaded 3D printed, temporary prosthesis in place.
Surgical and Prosthetic approach in the Mandible
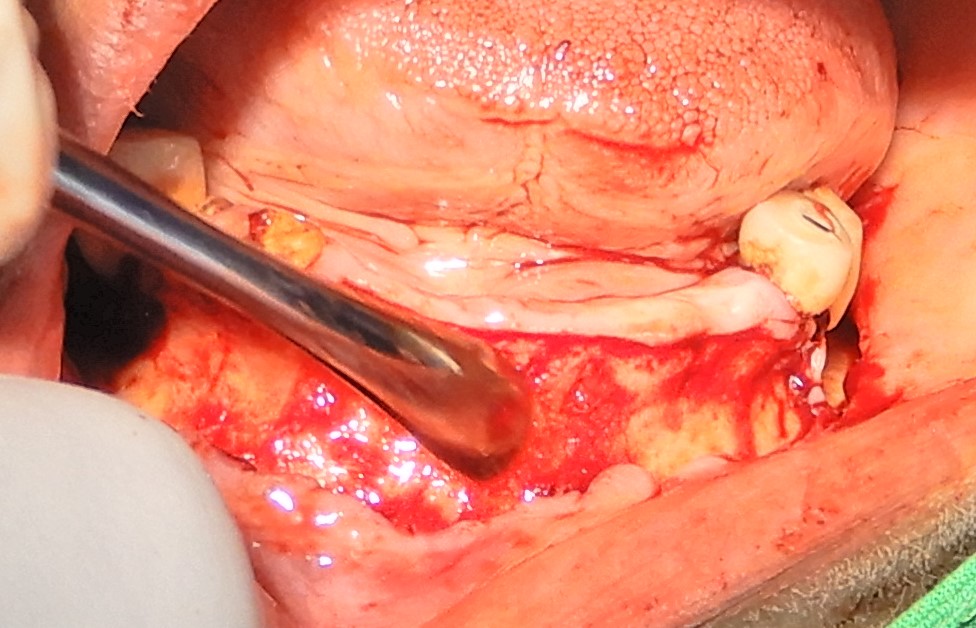
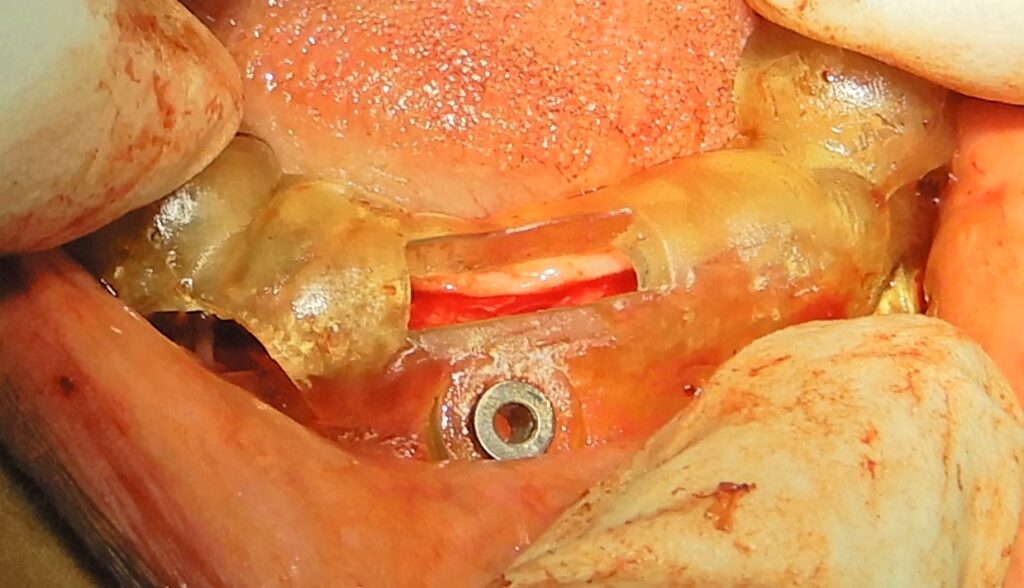
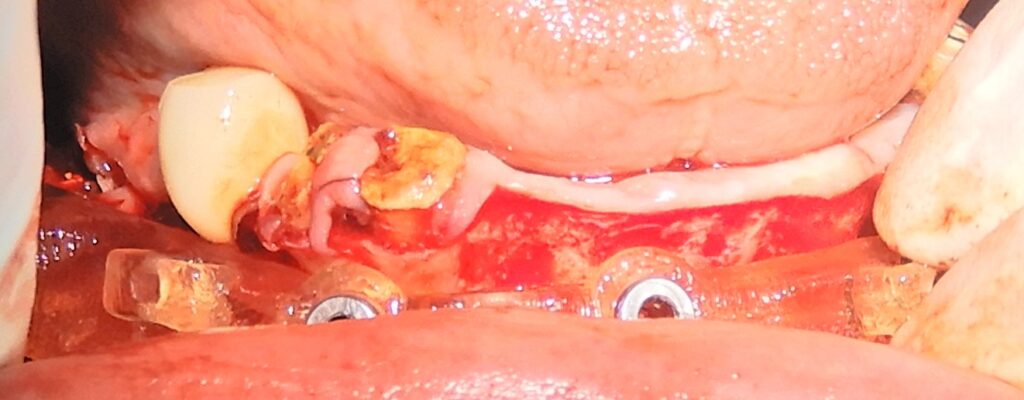
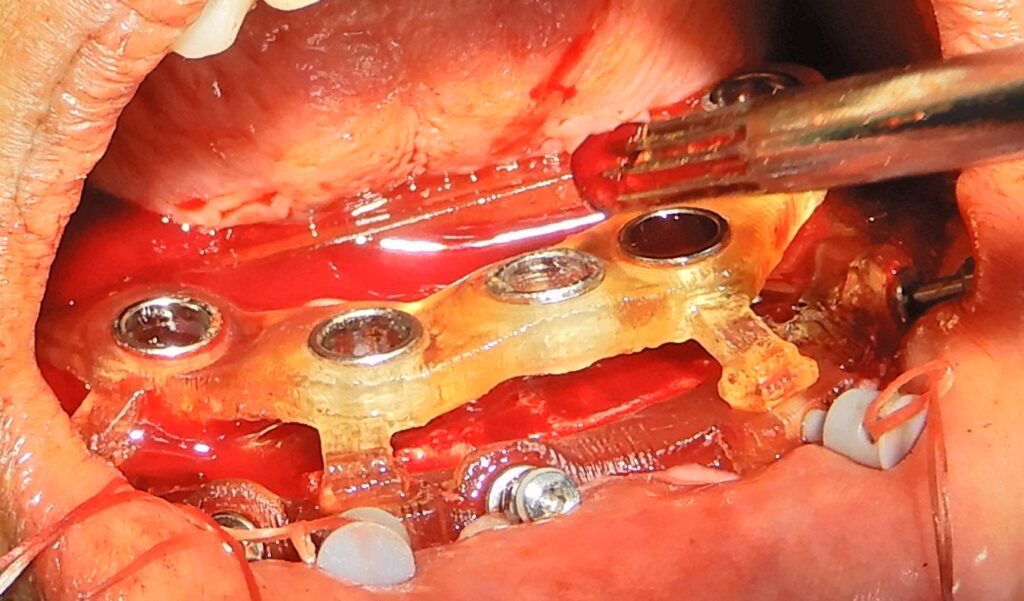
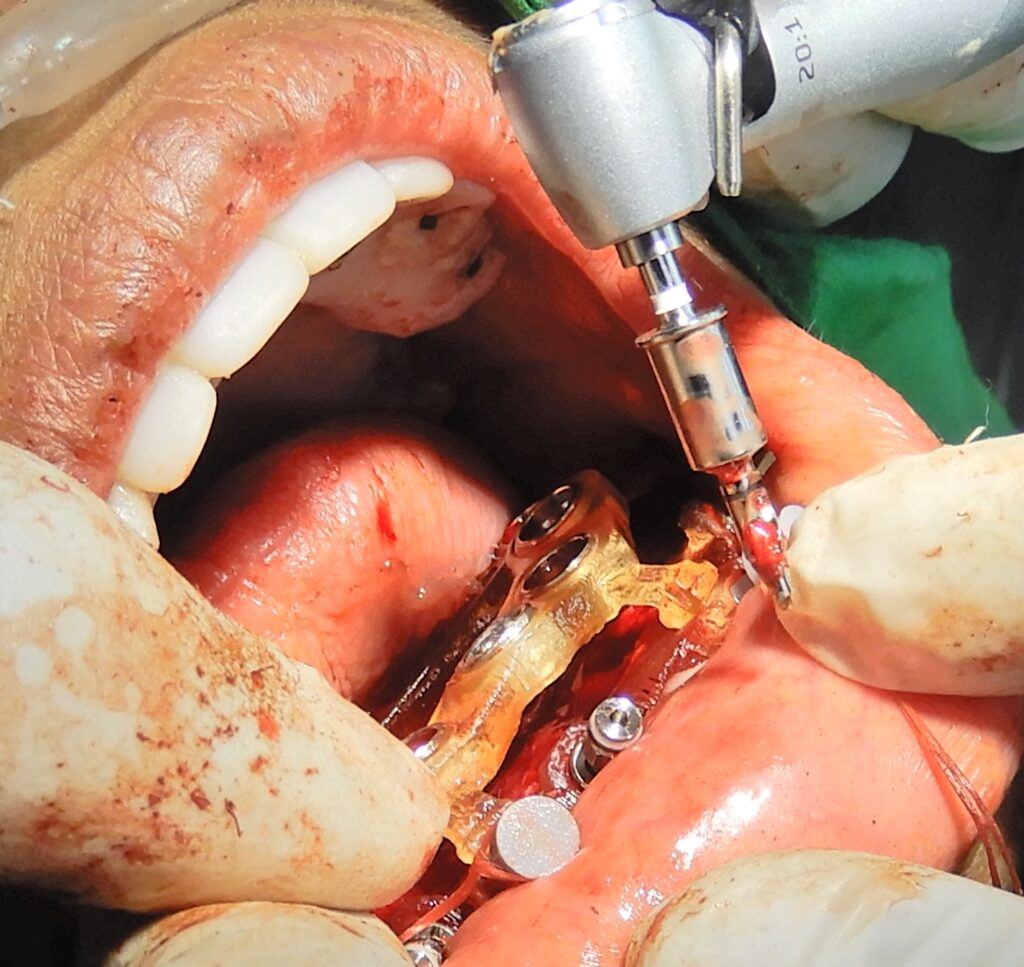
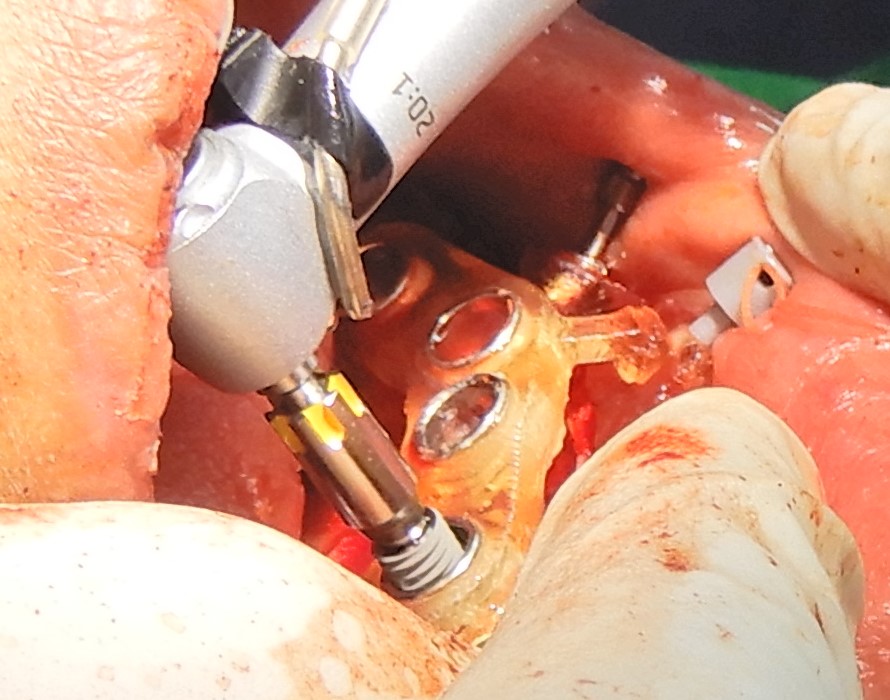
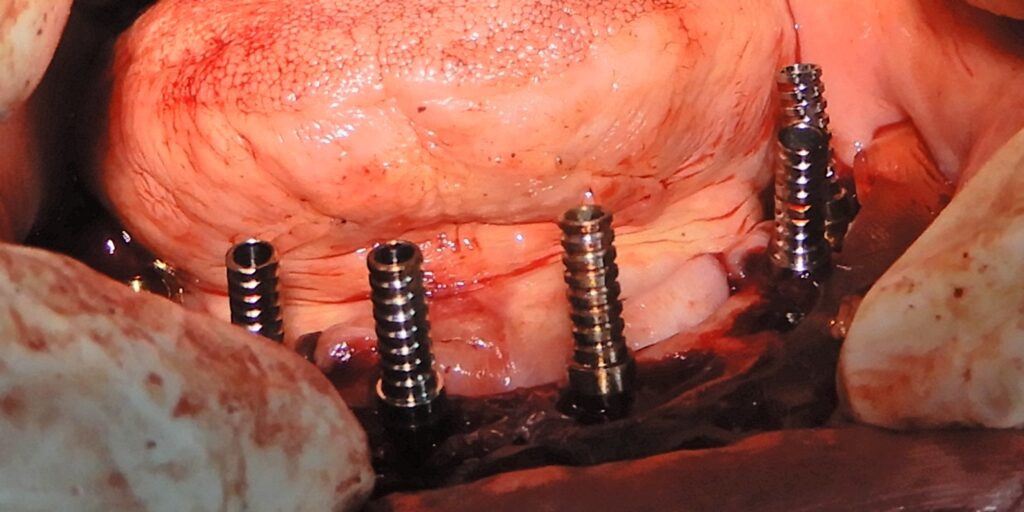
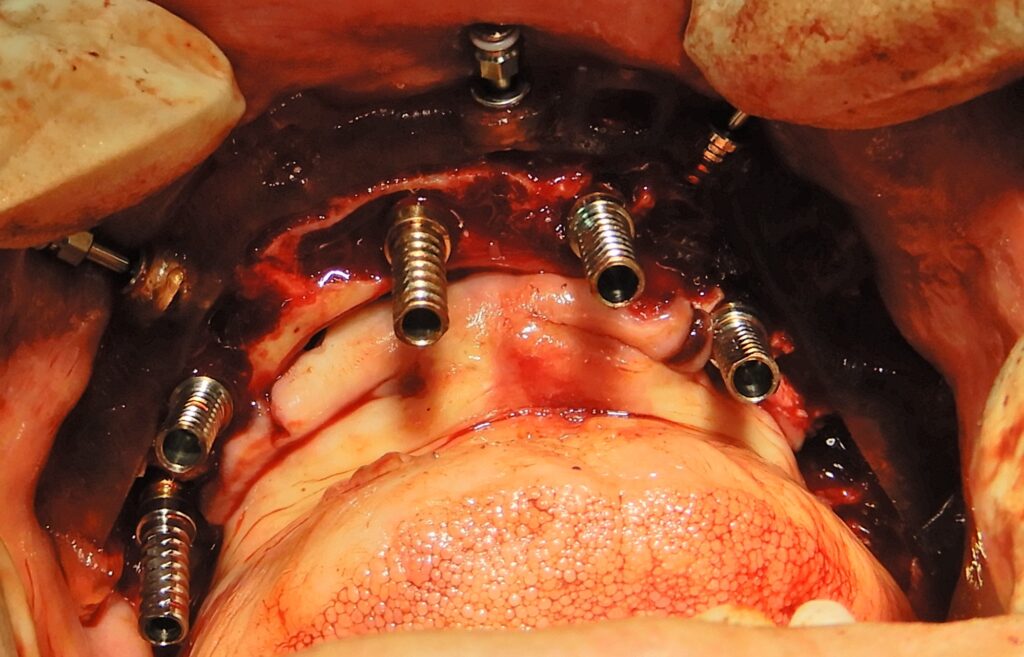
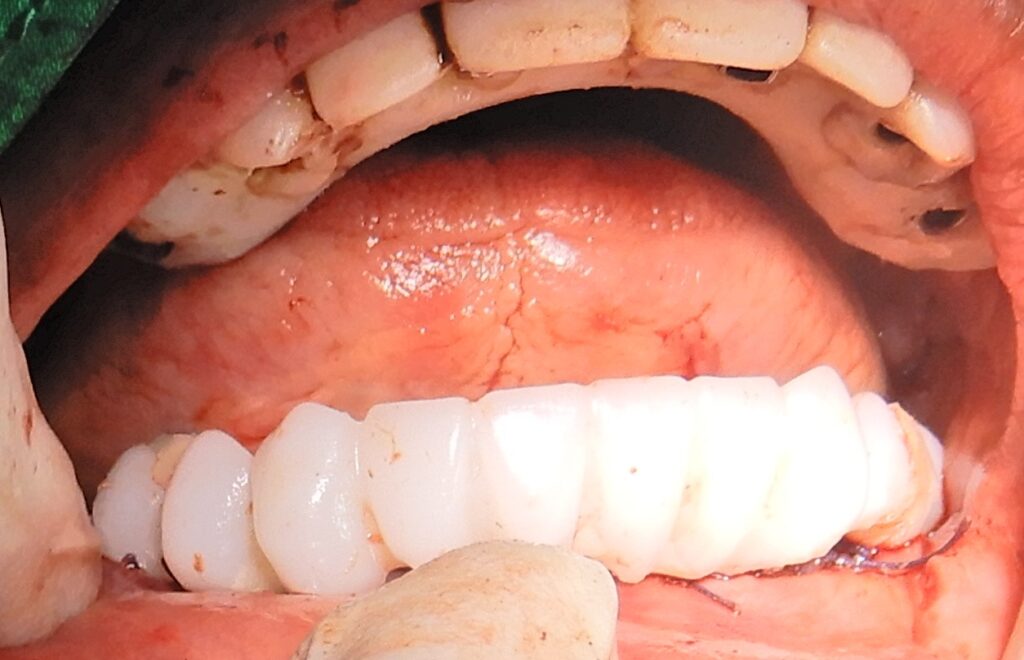
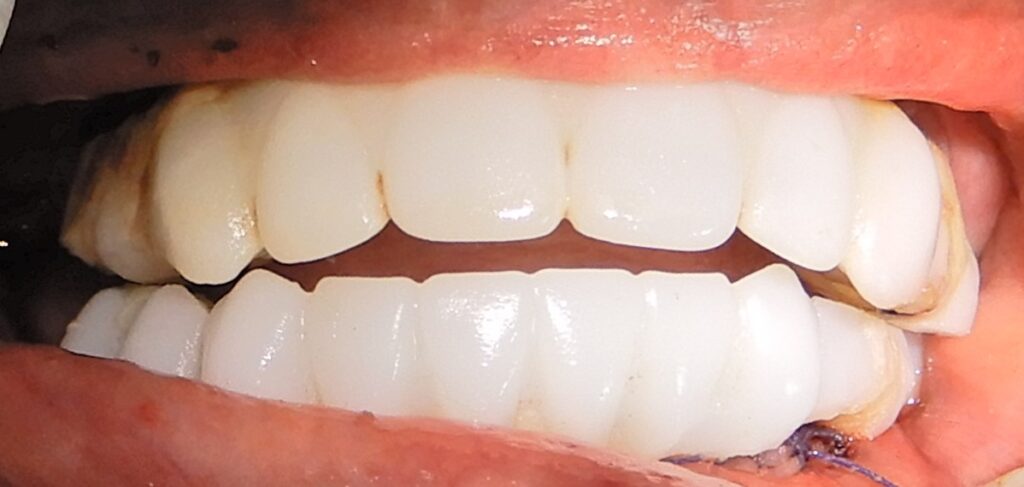
I applied the same surgical protocols for the lower jaw, where five strategically placed implants supported a temporary prosthesis. Additionally, two large cysts under the lower lateral incisor regions. They were carefully curated and packed with the bone graft materials used on the upper arch. Ensuring comprehensive reconstruction before the site closure.
Post operative
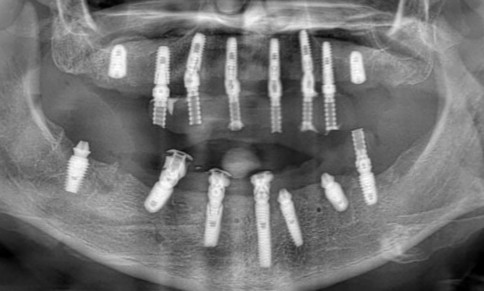
Post-operative OPG panoramic radiograph. Showing a complete All-on-X dental implant restoration with multiple implants integrated into the jawbone supporting a full-arch prosthesis
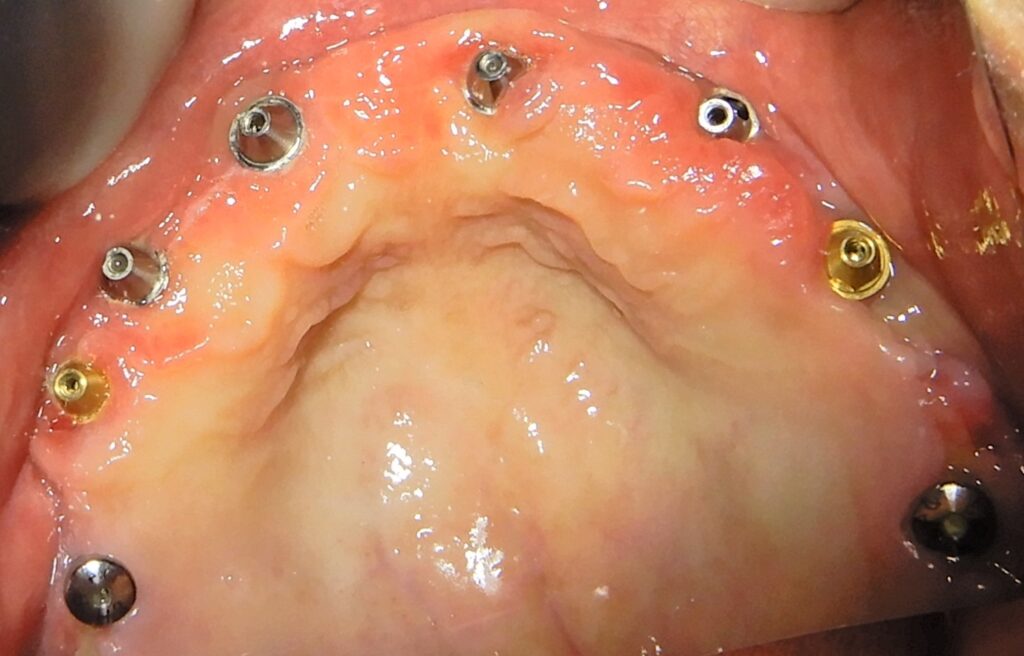
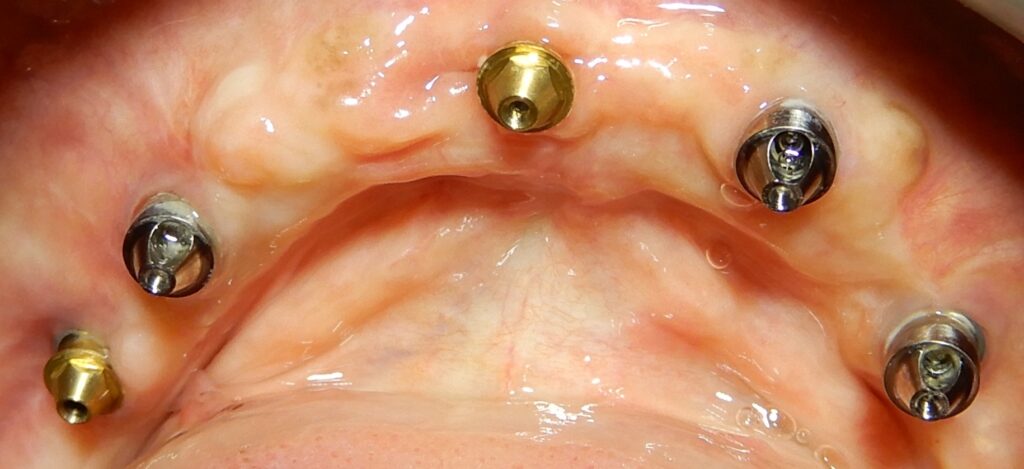
Comparative occlusal views of the upper and lower arches. Two months post-operatively, highlighting the successful integration of All-on-X dental implants and multi-unit abutments.
Prosthetic Phase
- Intermediate Prosthesis
- Final Prosthesis
Intermediate Prosthetic Phase.
This is the most important stage in the Full-mouth-prosthetics. This stage will reclaim patients, final aesthetics and function. Considerations in this stage are,
- Vertical Dimension.
- Antero-posterior Dimension.
- Labial fullness.
- Dental midline and symmetry.

"Dr. Hirantha Weragoda, BDS (Hons), is a specialized Dental Surgeon with expertise in Implants, Oral Surgery, Zygomatic implants, and Full mouth reconstruction in Sri Lanka. Graduating with Honors, Dr. Weragoda is committed to clinical excellence and advanced dental solutions."
View All Articles